Framer X Prototype: Snapchat Like Camera App with Color Filters, GIFs and No Code
A quick Framer X tutorial to prototype a Snapchat like camera app with color filters and no code. If you are just starting with Framer X this tutorial will show you how to build realistic, world class like UX without code. It takes about 30 minutes and an alternative view of Framer X.
What You Will Need
- Framer X trial or subscription
- Basic understanding of Framer X
- A loyalty free photo (eg pexels.com)
I am using Snapchat as an inspiration for a few good reasons. The app is well known and loved. They created and popularized the idea of real-time color filters with a swipe. The Snapchat UX mostly rocks.
That said, this is a Framer X prototype without code. You can also download and play with the official Snap Kit Store component here.
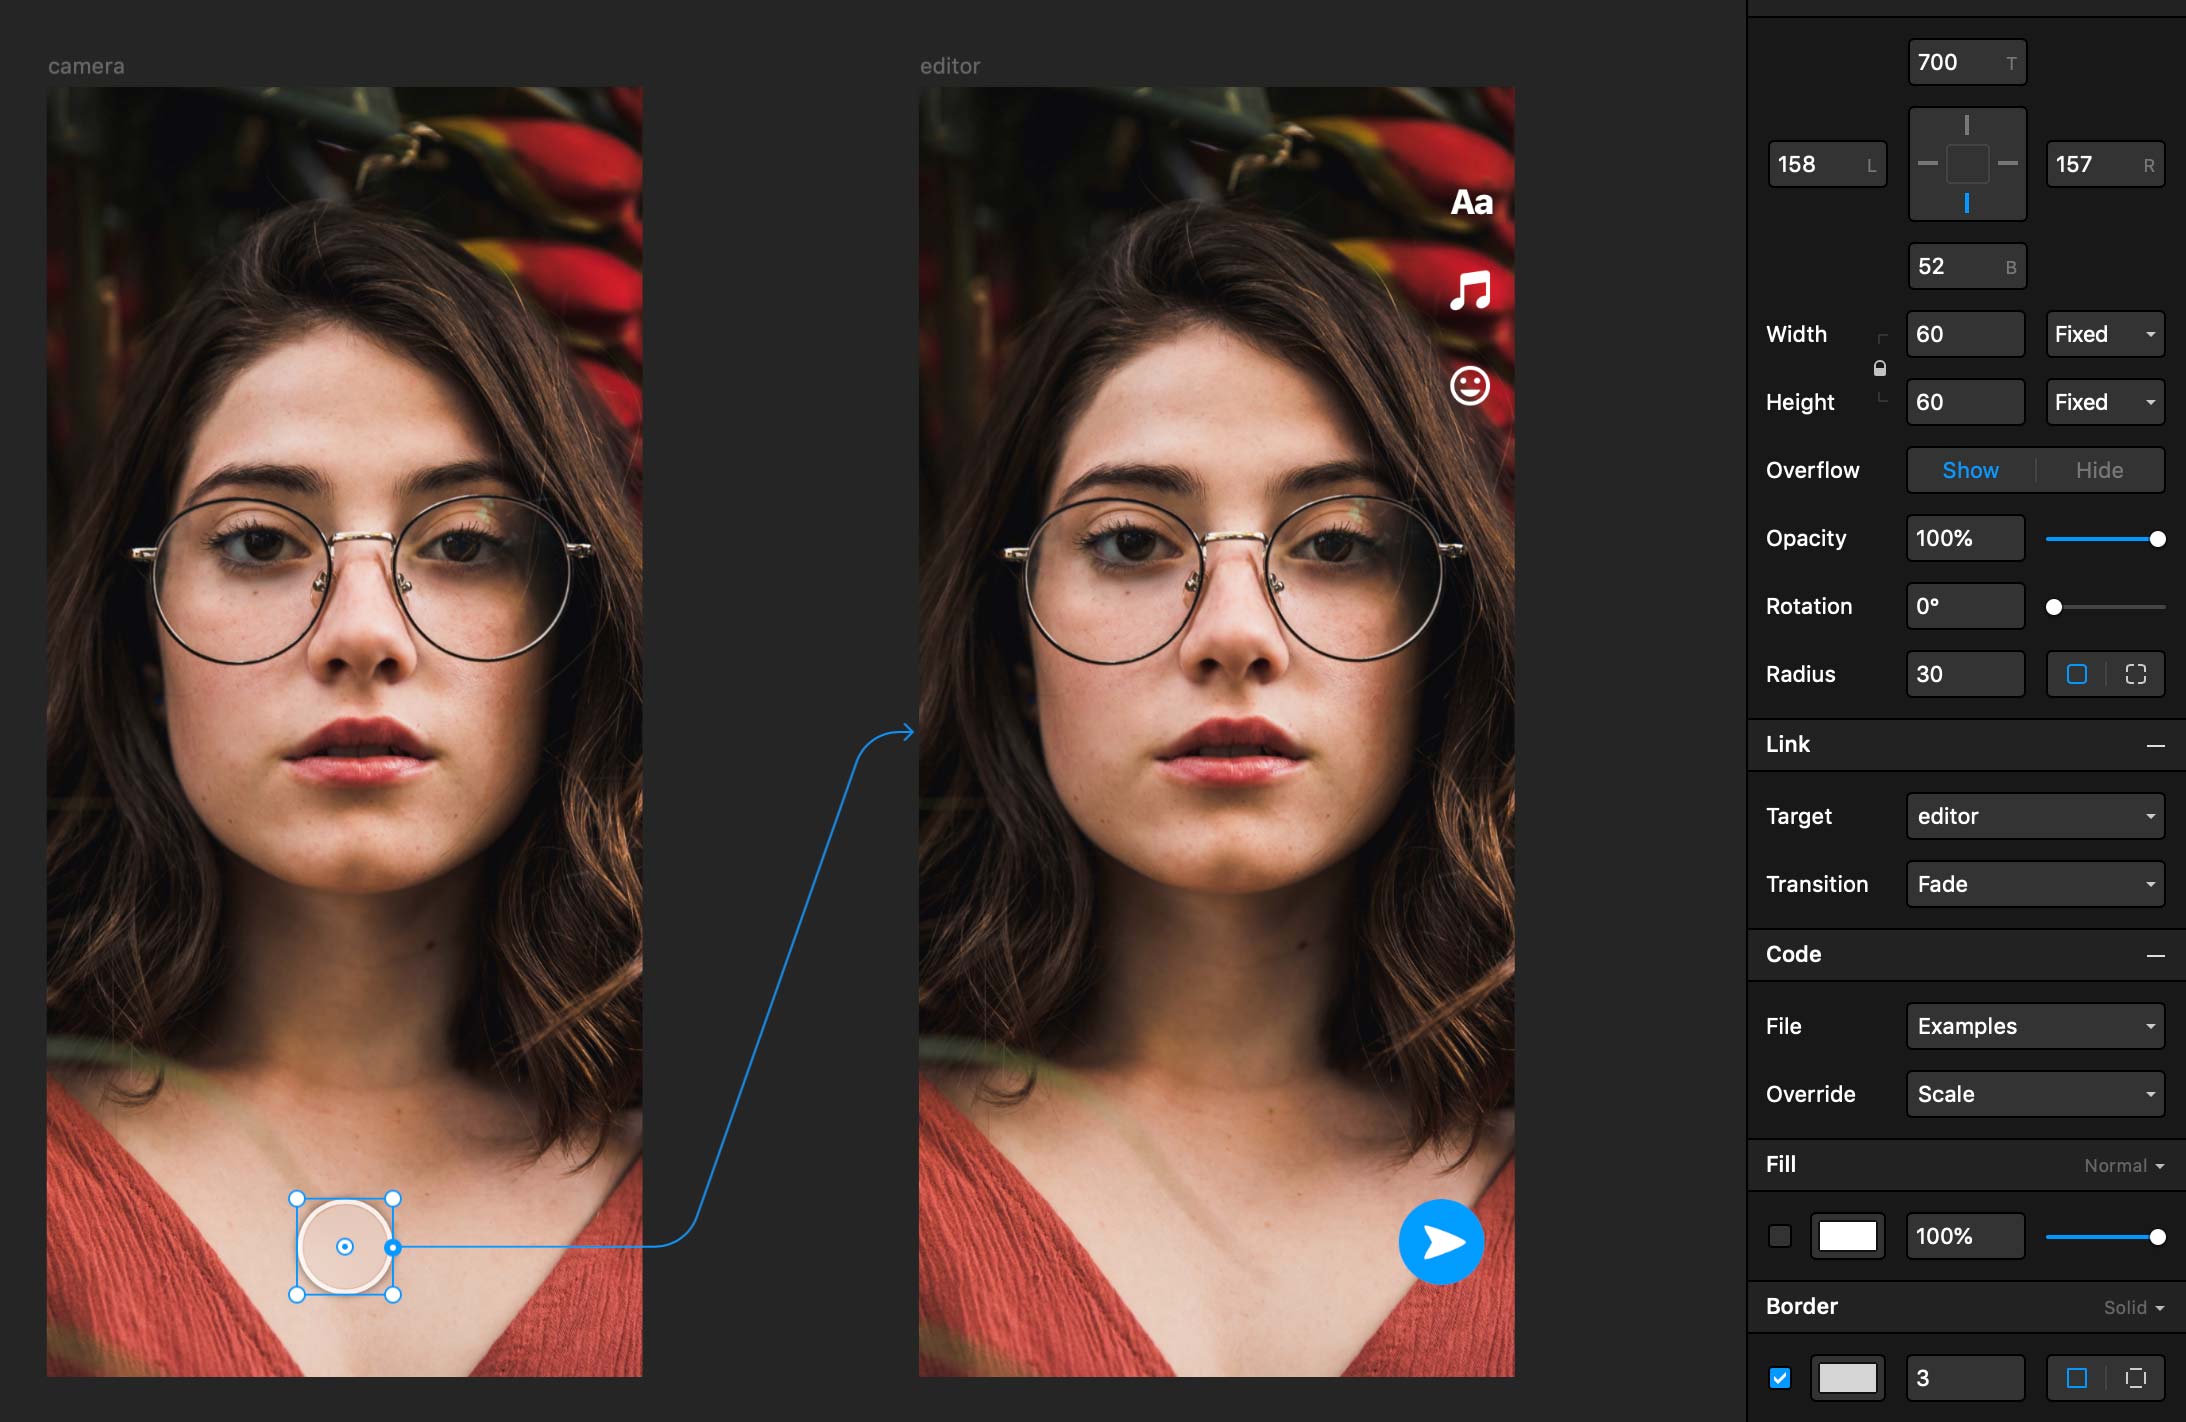
The Twisted Page Tool Component

The prototype uses the Page Tool component with a twist. Often the Page component appears in UIs in the form of cards filled with photos and text. For this prototype, the frames inside the Page component appear as reduced opacity colors. These frames create the impression of color filters.
One frame includes text to simulate the Snapchat temperature filter and another has a GIF. The idea is to simulate Snapchat’s geo location filters.
Some frames appear blank in the canvas. That’s because the opacity of the color is set to 0. There is a good reason for that.
The first frame is a non color filter. It is how the original photo looks like. The frames with text and GIFs are also set to zero opacity so that the content overlays the photo.
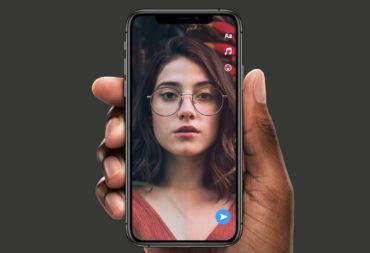
The Camera View
The camera screen is a frame with a photo and a camera button. The button is linked to the next frame with the Link Toll and a fade transition. This particular transition creates a pseudo effect of taking a photo.
If you want to use the real camera you can download the Webcam component here or download the Camera Feed component here.
Keep in mind that both components can access the real camera only in browser preview.
To simplify and speed things up I used this woman’s portrait photo from pexels.
The Editor View
When the user takes a photo the app view moves to the photo editor. The editor is a copy of the camera frame sans the camera button. It’s the place where the Page Tool / component lives.
The Page component sits on top of the photo so that the swipe events fire. There are a few more icons in there to make the prototype look more realistic.
The icons on the top right are a mix of text and the icons8 component from the Store. The icon on the bottom right is a graphic that I made in Framer X.
All six frames connected to the Page component are simple frames with appropriate fill and opacity. Some frames have no fill and others have a color fill with opacity set to 15%.
Wrapping Up The Prototype
Using a link with one of the built-in Framer X transitions and the Page Tool, you can create a high fidelity prototype. You can make it as realistic as you want or experiment with ideas for camera apps. All that with no code.
Here’s a last minute trick to make the prototype a tad more interesting. You can use a Code Override from the Framer X examples file.
Select the camera button in the camera frame. Then click Code on the right pane. From the built-in Examples file select Scale. Hit Command + P to preview your prototype with a little sweet animation on the camera button.
See More Prototypes With No Code
A complete redesign of SBB iOS app, the most popular app in Switzerland.
Recreation of TechCrunch’s mobile website, one of the most popular sites in the world.
Accelerometer based effects in Framer X without code.
Thanks to Panos for proofreading this.